
Mastering The Art Of Roof Repairs
Mastering The Art Of Roof Repairs In the realm of home maintenance, few tasks are as crucial as Roof Repair Techniques and Tips. Your roof stands as the stalwart sentinel guarding your abode against the caprices of nature. To ensure its longevity and resilience, it’s imperative to understand the nuances of effective roof repair. In this comprehensive guide, we’ll navigate through the step-by-step process, incorporating Quality Materials for Professional Repairs and seeking insights from Local Roof Repair Specialists.
Step-By-Step Guide to Roof Repairs: Unveiling the Art
1. Assessment and Planning: Every masterpiece starts with a clear vision. Begin by assessing the condition of your roof. Identify areas that need attention and plan your repairs meticulously. Take into account not only the visible damage but also any hidden issues that might be lurking beneath the surface.
2. Safety First: Safety is paramount in any work of art. Before you embark on your repair journey, make sure you have the necessary safety equipment. Harnesses, helmets, and non-slip footwear are your armor against potential accidents.
3. Material Selection: Just as an artist selects the finest paints and brushes, a roof repair specialist chooses quality materials. Opt for materials that are not only aesthetically pleasing but also designed to withstand the elements. This is where the choice of materials intertwines with the science of the repair.
4. Tear-Off and Cleanup: Like a sculptor chiseling away at a block of marble, the next step involves removing damaged or old roofing materials. Dispose of these materials responsibly, and ensure the work area is clean and safe.
5. Surface Preparation: A canvas must be primed before a painting can begin. Similarly, your roof surface must be prepped. This involves repairing any damaged substrate, ensuring a smooth and even surface for the new materials.
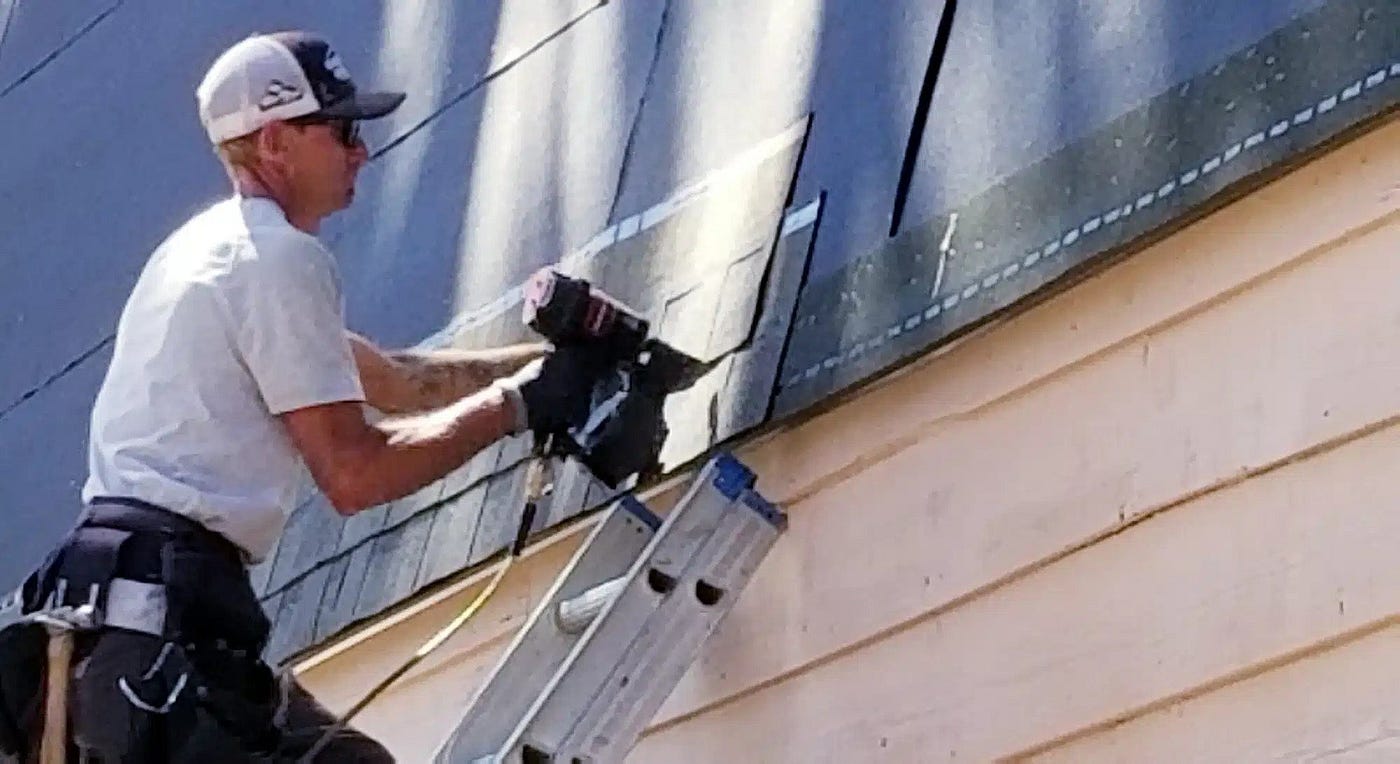
6. Installation: The installation of new roofing materials is where the art of repair truly shines. Each piece must be carefully placed, aligning perfectly with the others. The precision of installation determines not only the aesthetic appeal but also the functionality of the repair.
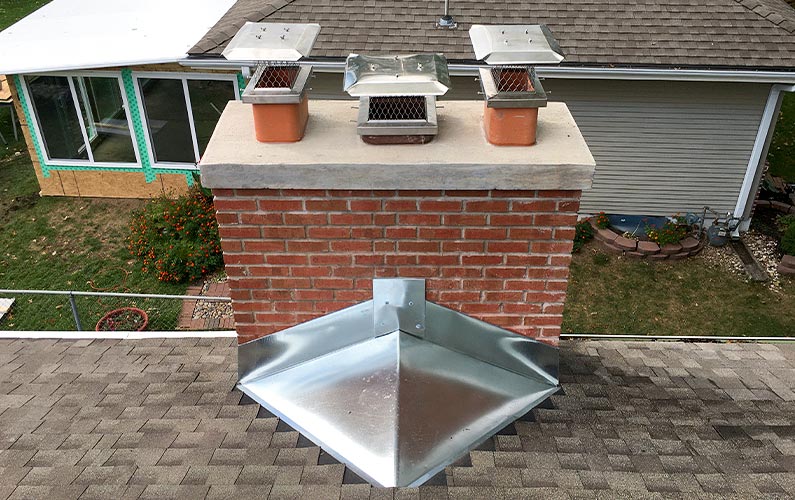
7. Flashing and Sealing: Just as an artist adds the finishing touches to a masterpiece, roof repair specialists focus on flashing and sealing. This step ensures that vulnerable areas, such as vents and chimneys, are protected from leaks and drafts.
8. Quality Inspection: A masterpiece is not complete without a critical eye. Inspect your repair work meticulously. Look for any imperfections or areas that may need further attention.
9. Cleanup and Maintenance: The final strokes of the repair involve cleaning up the work area and ensuring that all waste is disposed of properly. Regular maintenance is the ongoing care that ensures your repair remains a work of art for years to come.
The Foundation: Quality Materials for Professional Repairs
Before embarking on any repair journey, it’s paramount to arm oneself with the right materials. Investing in top-notch components ensures that your repairs stand the test of time. Opt for materials that are specifically designed for your type of roof, considering factors like climate, slope, and exposure.
Uncommon Terminology: Delving Deeper
- Flashing: This is a thin, weather-resistant material, often made of metal, used to direct water away from critical areas, like seams and joints.
- Underlayment: It’s the protective layer installed beneath the visible roofing material. It acts as an additional barrier against moisture.
- Eave: The lowest edge of a roof, which overhangs the face of a wall. Proper eave protection is vital in preventing water damage.
- Rafter: These are the inclined beams that support the roof’s structure. They play a pivotal role in distributing the weight of the roof.
Step 1: Thorough Inspection – The Bedrock of Successful Repairs

Begin with a meticulous examination of your roof’s condition. Look for signs of wear and tear, such as cracked or missing shingles, dislodged flashing, or sagging areas. Pay special attention to potential trouble spots like valleys, where two roof planes meet, and chimneys, where flashing is often employed.
Short Sentence for Emphasis
Spotting minor issues early can prevent them from escalating into major, costly repairs.
Step 2: Gathering the Right Tools
Equipping yourself with the correct tools is half the battle won. Here’s a concise list of essentials:
- Safety Gear: Helmets, harnesses, and non-slip footwear are non-negotiables.
- Roofing Nails and Hammer: Opt for galvanized or stainless steel nails for durability.
- Roofing Adhesive: A high-quality adhesive is indispensable for securing shingles and flashing.
- Ladder: Ensure it’s stable and extends well beyond the edge of the roof.
- Sealant: A waterproof sealant is invaluable for plugging leaks.
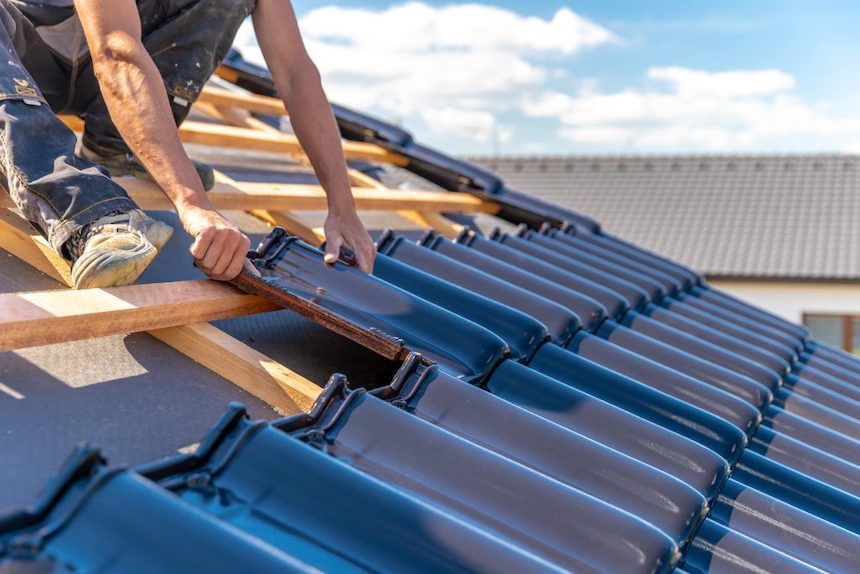
Step 3: Shingle Replacement – A Key Element in Roof Repair Techniques
Long Sentence for Detail
Carefully remove damaged shingles, starting from the highest point and working your way down. Slide a flat bar under the damaged shingle to lift the tabs of the shingle above it, allowing for safe removal.
Uncommon Terminology: Elevating Understanding
- Tab: This is the exposed portion of a shingle. It’s the part that’s visible once the shingle is installed.
- Flat Bar: Also known as a pry bar, this tool is designed for removing nails and prying apart materials.
Step 4: Flashing Repair – Safeguarding Vulnerable Areas
Flashing is akin to a sentinel, guarding the vulnerable points of your roof. Over time, it may succumb to wear and tear, necessitating timely repairs.
Short Sentence for Emphasis
A seamless flashing repair ensures water stays where it belongs—away from your home’s interior.
Step 5: Underlayment Assessment – The Silent Protector
Inspect the underlayment for any signs of damage or degradation. It’s the unsung hero, providing an additional layer of defense against moisture.
Step 6: Sealant Application – The Final Touch
Apply a generous layer of high-quality sealant around vents, chimneys, and other protrusions. This creates an impermeable barrier against water infiltration.
Step-By-Step Guide to Roof Repairs: A Recap
- Thorough Inspection: Identify weak points and potential problem areas.
- Gathering Tools: Ensure you have the necessary equipment for a seamless repair process.
- Shingle Replacement: Address damaged shingles systematically, starting from the top.
- Flashing Repair: Fortify critical areas with robust flashing.
- Underlayment Assessment: Confirm the underlayment’s integrity.
- Sealant Application: Create a waterproof seal around vulnerable points.
Stop: Mastering The Art Of Roof Repairs
By following this comprehensive guide, you’re not only prolonging your roof’s lifespan but also bolstering the structural integrity of your cherished abode. With the incorporation of Quality Materials for Professional Repairs and insights from Local Roof Repair Specialists, you’re well on your way to mastering the art of roof repairs. Remember, a well-maintained roof is the steadfast guardian of your home’s comfort and security.


